
Saturday, May 6, 2017
Saturday, May 24, 2014
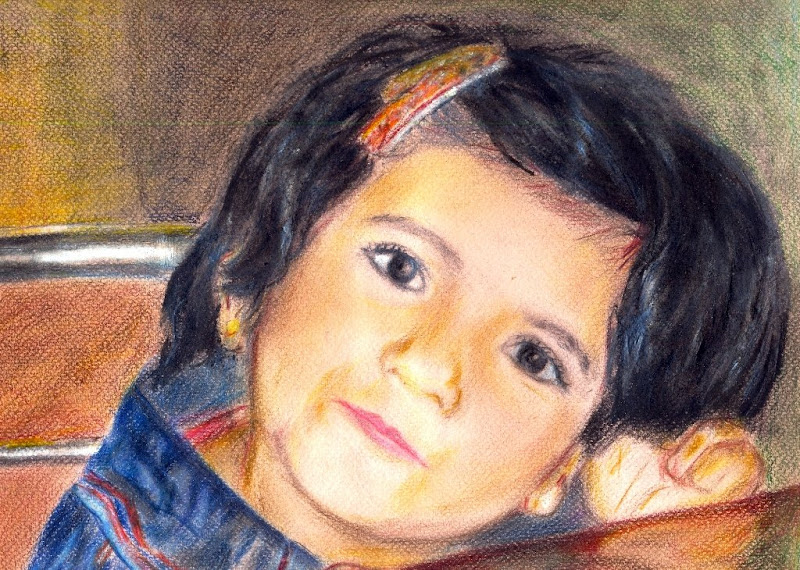
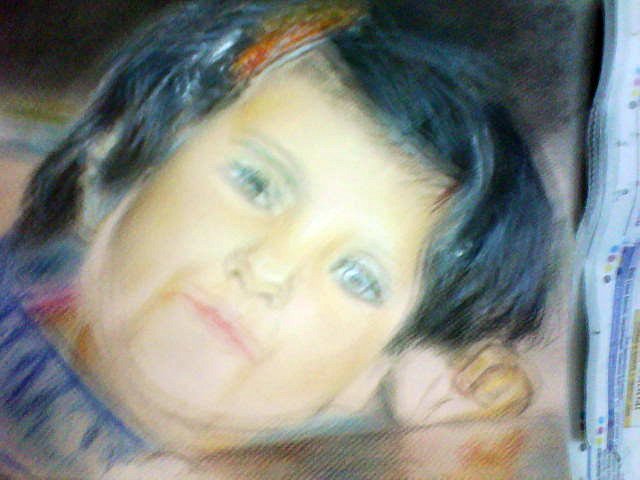
Making of '...finally'
It all started when I came across this document which claimed your drawing will improve just looking at these portraits, really awsome stuff, one I shared in my previous post Inspiration(http://roadmaps4soul.blogspot.in/2013/03/inspiration.html)
Captivated, i decided to take it further, hoping that actually drawing this will improve me even more. Moreover I'd been fascinated by idea of drawing on mid tone paper and wanted to see the effect it creates.
Drawing on plain white paper you have range from whitest white (no pencil ) to darkest black (darkest pencil mark). On the other hand, drawing on midtone paper provides a 2x range of tones, from whitest white (whitest white pastel mark) to midtone (no pencil) to darkest dark (darkest dark pencil).
I really wanted to get started fast and so found a large brown envelop and got going... ( Next time I'll get a good quality paper).
My experiences with chalk were really sad. Not much control and sad overall effects. A walk through the art supply supershop (Himalaya's at Banjara hills, Hyd) gave me what i was looking for, a white pastel pencil that you can sharpen like a normal pencil, allowing for all the control you want.
I started out with 'no deadlines' mood. As usual I ran out of enthu in middle.


I kept it unfinished on display in living room. People visiting me told she's looking good, which drove home the point that She's not done yet. And her accusing stare was enough to get my bum moving and finish.


There was turbulence on personal and professional front and she gave me comforting escape for many days.


In the end after I sprayed with fixer, scanned and put her away in store, I missed her at her usual place in living room display.
It'll go away in few days, I told myself, its the same thing with all drawings I do.
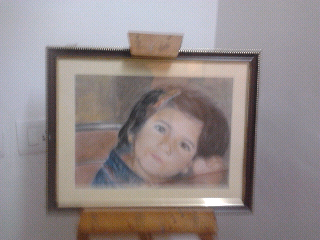
Few days back my wife (god bless her) as a gift got her framed and back in the living room.
Some love stories do have happy endings I guess ...
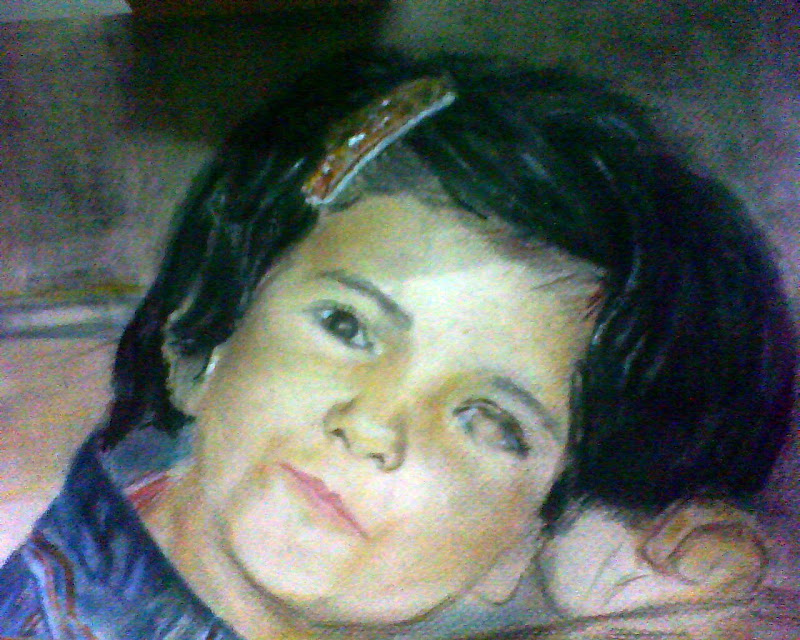
Captivated, i decided to take it further, hoping that actually drawing this will improve me even more. Moreover I'd been fascinated by idea of drawing on mid tone paper and wanted to see the effect it creates.
 |
| ...finally finished |
I really wanted to get started fast and so found a large brown envelop and got going... ( Next time I'll get a good quality paper).
My experiences with chalk were really sad. Not much control and sad overall effects. A walk through the art supply supershop (Himalaya's at Banjara hills, Hyd) gave me what i was looking for, a white pastel pencil that you can sharpen like a normal pencil, allowing for all the control you want.
I started out with 'no deadlines' mood. As usual I ran out of enthu in middle.
 |
| Starting enthusiastically |
 |
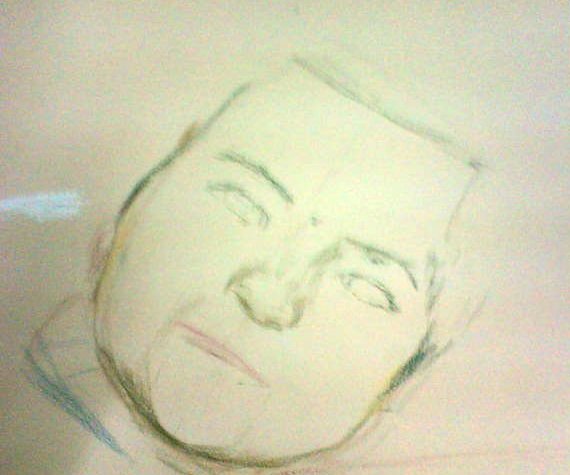
| Breaking all rules to see effect of chalk on paper |
 |
| Wait a minute, graphite produces awful scan, redo with charcoal (ugh!) |
 |
| At this point I ran out of steam |
 |
| Returning after almost a fortnight; enthusiasm's up again |
There was turbulence on personal and professional front and she gave me comforting escape for many days.
 |
| She's got the 'Bathed in light' effect that I want but she has a unnatual ghastly look about her. Better tone down! |
 |
| Fixer spray discolored the paper, what to do. Ready for scanning! |
|
| Its all over now baby blue, good bye! |
It'll go away in few days, I told myself, its the same thing with all drawings I do.
Few days back my wife (god bless her) as a gift got her framed and back in the living room.
Some love stories do have happy endings I guess ...
 |
| ...Finally |
Saturday, March 2, 2013


Friday, February 15, 2013
Saturday, June 23, 2012
Bhavna
Today's post features drawing I had made of my dear wife, Bhavna.


I drew this with a charcoal pencil as she was watching TV. Although I liked the drawing, it looked a bit awkward as her shoulders seemed to be drooping which kind of marred the entire sketch.
It was much later i decided to scan it and then crop in to retain only face.... I like the way it looks now.
Sunday, July 17, 2011
Frames & finishing
From the begining, when i first thought about starting apple's portrait i was clear that it was made to be displayed & not to be locked in some folder or drawing book.
Thing is i had no idea about frames and afraid that it is going to get botched if i don't get it corrctly done. And so it actually ended up being locked and forgotten. I did search for ideas on net and could not find anything remotely useful. One day i decided it enough and set out looking for shops dealing with framing. i settled in for the first shop i encountered.
The end result was surprisingly quite nice and it is now proudly displayed in my living room.
One thing i learned is that drawings are best framed in a bevel (i hope it is called bevel) which introduce space between drawing surface and glass covering. in oil paintings u don't need glass at all because the material is quite tough.
And so i look towards you, old faithful ones for feedback and advice.
Please don't let me down :-)

Monday, June 13, 2011
Monday, August 2, 2010
Color Pencils lesson series: Apple (Step by steps)
I really took a long time while doing it, I think it took more than 4 months to get finished. To be honest I had almost given up on it many times and in the end I was happy to see it finished and finally paint fixative for closing.
I did one thing here, took many photographs of the picture from my phone camera hoping to cover it in a blog post.
To get started i just added the images. with time I will add more text ...
Apple (finished version)
Basic Outlines with pencil on toned paper
Adding details

Adding dark tones with charcoal with few color pencil details

Readjusting proportions and adding flesh outlines
(Still) More details and colors
Final finished version
Reference Photograph

Subscribe to:
Posts (Atom)